Easy & Creamy Classic Deviled Eggs Recipe

Deviled eggs have earned their place as a classic appetizer at family gatherings, holiday meals, and especially at picnics and church potlucks in the Midwest. There’s something so comforting about this simple dish, made from fresh eggs and a handful of pantry staples, that has kept it at the top of the appetizer list for generations. We were recently gifted these beautiful fresh eggs and knew it was the perfect time to test out this recipe!
Today, let’s dive into the rise and fall of deviled eggs, how they’ve become a staple at special occasions, and, of course, how to make the best deviled eggs that everyone will love.
This post may contain affiliate links. If you click on a link and then make a purchase, I may get a small commission from that sale, at no extra cost to you.

The Rise and Fall of Deviled Eggs
While deviled eggs might not be as trendy as some newer appetizers, they’ve stood the test of time. At family gatherings or holiday meals, they’ve been a family favorite. You’ll often find these creamy, bite-sized snacks at church potlucks or picnics, where they’re passed around in a deviled egg tray for everyone to enjoy. Despite their long history, deviled eggs seem to have fallen out of favor in recent years.
As food trends evolve, some home cooks and even professional chefs view deviled eggs as too simple or outdated compared to fancier dishes. Or like us, maybe you felt they were too time-consuming and difficult to prepare, especially with the worry of peeling eggs and creating the perfect creamy filling. In truth, this is just a misconception! Deviled eggs are actually quite simple to make with a little practice. The hardest part is cooking the eggs perfectly so that you can peel and remove the cooked yolk, and that’s easily achievable with the right technique.
Deviled eggs are also a dish that can be easily personalized—whether you like spicy seasonings, creamy textures, or zesty flavors, you can create the best deviled eggs for your taste. With simple ingredients and a little creativity, deviled eggs are a timeless classic appetizer that never truly went out of style. Now, join us in rediscovering how easy it is to make these great recipes for all types of gatherings.
The Secret to Easy Deviled Eggs
Making deviled eggs is an easy recipe anyone can master with just a few simple ingredients. If you’ve ever wondered how to make hard-boiled eggs that are perfect for deviling, the key is in the cooking time. You’ll want to make sure the eggs are hard-boiled but not overcooked. Overcooking can result in an undesirable grayish ring around the egg yolks and a rubbery texture. If cooking the eggs is an intimidating step for you, we recommend trying a rapid egg cooker instead.

What You’ll Need:
- 6 fresh eggs
- 1/4 cup mayonnaise
- 1 tablespoon Dijon mustard
- 1 tablespoon yellow mustard
- Salt and black pepper, to taste
- 1 tablespoon pickle relish
- 1-2 teaspoons lemon juice, fresh squeezed or bottled
- A pinch of paprika for garnish (optional)
- Fresh chives for garnish (optional)
The Simple Method: Step-by-Step Instructions
Step 1: Preparing the Eggs
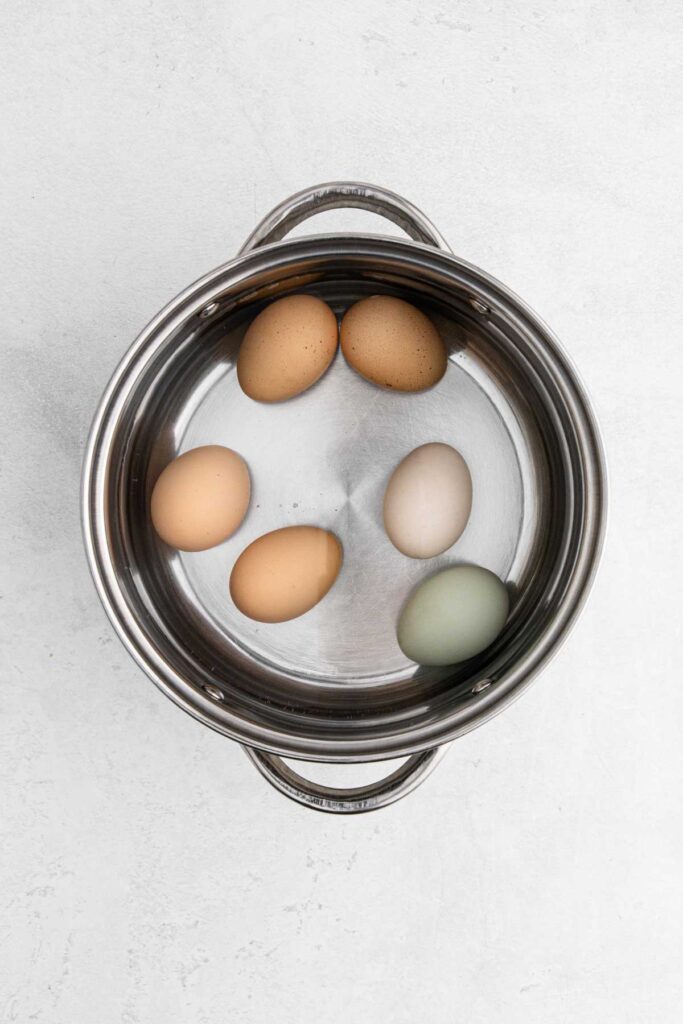
Start by placing eggs in a single layer in a large saucepan. Add enough cold water to the pot to cover the eggs by at least an inch. Bring the water to a boil over medium-high heat. Once it reaches a rolling boil, reduce the heat slightly to keep the water at a gentle boil for about 13 minutes.
Step 2: Ice Bath for Perfect Hard-Boiled Eggs
Once your eggs are done, immediately transfer them to an ice bath in a medium sized bowl. This helps stop the cooking process and makes peeling the eggs much easier. Let the eggs sit in the cold water for 5 minutes, or until they are cool to the touch.

Step 3: Peeling the Eggs
Carefully crack each egg against the side of the bowl and peel off the shell. Starting from the wider end of the egg is usually easier. You’ll want to gently remove the eggshell while keeping the egg whites intact. If you prefer, you can also use fresh eggs and use an instant pot to make them even easier to peel.

Step 4: Cutting the Eggs
Once peeled, slice each egg in half lengthwise. Carefully remove the egg yolks and place them in a medium-sized bowl. The egg halves will be used to hold your creamy filling.

Step 5: Making the Creamy Filling
Mash the egg yolks with a fork until smooth. Add mayonnaise, Dijon mustard, yellow mustard, salt, and pepper to taste. For extra flavor, we like adding a touch of pickle relish. Mix everything together until you have a smooth, creamy filling.


Step 6: Filling the Egg Whites
Now comes the fun part! Use a spoon or a piping bag to fill the egg whites with the creamy yolk mixture. For a professional look, you can pipe the filling in a swirl pattern using a piping bag fitted with a star tip.

Step 7: Garnishing Your Deviled Eggs
If desired, garnish your deviled eggs with a sprinkle of paprika and freshly chopped chives for a burst of flavor and color. You can also experiment with additional toppings like bacon bits or a dash of cayenne pepper for an extra kick. The beauty of deviled eggs lies in their versatility. You can even serve them on a serving platter for a beautiful presentation.

Personal Touches and Variations
The beauty of deviled eggs lies in how easily you can make them your own. You can stick to the classic recipe with mayonnaise and mustard or add other flavors to suit your taste. For example, if you prefer a zesty food flavor, you can incorporate a pinch of cayenne pepper or smoked paprika into the filling. If you like the creamy texture of ranch dressing, you could swap out some of the mayo for ranch dressing.
Toppings can also add a delightful twist to your deviled eggs. Some of my favorite variations include adding chopped bacon, a sprinkle of cheese, or even a few slices of pickled jalapeños for a spicy kick. You can even change up the seasonings—adding a little curry powder or garlic powder gives the eggs a new flavor profile.
If you’re preparing these for a special occasion or a holiday meal, try adding a creative touch like a little dill pickle slice on top of each egg or a small sprig of fresh dill. The possibilities are endless, and each topping adds a layer of flavor that makes deviled eggs even more fun to eat.

Storing and Serving Your Deviled Eggs
If you’re making deviled eggs ahead of time for a family gathering or special occasion, it’s best to store them in an airtight container in the fridge until you’re ready to serve them. They’ll stay fresh for up to two days, but they’re best enjoyed within the first 24 hours. For easy transport, consider using a deviled egg tray that will keep them secure while you’re on the go.
Why Deviled Eggs are a Family Tradition
Deviled eggs have long been a part of family gatherings and picnics so we hope you get to try this recipe out soon and enjoy it with others! The simplicity of the recipe, combined with the ease of making them ahead of time, makes a timeless classic for large gatherings where food needs to be both delicious AND practical. They’re also a great way to get kids involved in the kitchen, as mashing the egg yolks and filling the eggs is an easy task for eager young hands.
Whether it’s for a church potluck or a holiday meal, deviled eggs have a way of bringing people together. Their creamy filling and simple ingredients make them a delicious appetizer for everyone.

Final Thoughts
Classic deviled eggs are a family favorite for good reason. They’re quick, easy, and versatile. By using fresh eggs, simple ingredients, and a bit of creativity, you can create a batch that will wow your guests and bring a taste of tradition to your next family gathering. Whether you’re attending a special occasion, hosting a holiday meal, or just craving a classic appetizer, deviled eggs are always a crowd-pleaser. Try out this easy recipe next time, and discover why this dish is still a beloved favorite today. For the best results, don’t be afraid to experiment with toppings and seasonings to make them your own!
Looking for another special occasion/party favorite recipe? Try our delicious and simple to make Sausage Balls

Easy & Creamy Classic Deviled Eggs Recipe
Ingredients
- 6 large fresh eggs
- 1/4 cup mayonnaise
- 1 tablespoon Dijon mustard
- 1 tablespoon yellow mustard
- Salt and black pepper to taste
- 1 tablespoon pickle relish
- 1-2 teaspoons lemon juice
- Fresh chives and paprika for garnish optional
Instructions
Boil the Eggs:
- Place the eggs in a large saucepan and cover with cold water, ensuring the eggs are fully submerged. Bring the water to a boil over medium-high heat. Once boiling, reduce the heat to a simmer and cook for 9-12 minutes.
Cool the Eggs:
- After boiling, carefully transfer the eggs to an ice bath or a bowl of cold water to stop the cooking process. Let the eggs cool for 5-10 minutes.
Peel the Eggs:
- Gently tap the eggs on a hard surface to crack the shells. Peel the eggs, starting from the wider end, and set aside.
Cut and Remove Yolks:
- Slice each egg in half lengthwise and gently remove the egg yolks, placing them in a medium mixing bowl. Set the egg whites aside.
Prepare the Filling:
- Mash the egg yolks with a fork until smooth. Add mayonnaise, Dijon mustard, yellow mustard, salt, and black pepper to taste. Optionally, mix in pickle relish, vinegar or lemon juice for extra flavor. Stir until smooth and creamy.
Fill the Egg Whites:
- Spoon or pipe the yolk mixture into the egg whites. For a professional look, use a piping bag to swirl the filling.
Garnish:
- Garnish with paprika, chives, or bacon bits, if desired.
Serve:
- Arrange the deviled eggs on a serving platter and refrigerate until ready to serve. Serve chilled for the best flavor.
Notes
- If you prefer a richer flavor, add a little more mayonnaise or Dijon mustard.
- For extra creaminess, swap out some of the mayo for sour cream or cream cheese.
- You can also experiment with toppings like pickled jalapeños or grated cheese to add a unique twist.
- Make sure to store leftover deviled eggs in an airtight container in the fridge for up to 2 days.